
Introduction
Origami Dog Brown
Origami, the ancient Japanese art of paper folding, has captivated crafters worldwide for centuries. Among the many delightful creations possible, the origami dog stands out as both adorable and achievable for beginners. Using brown paper specifically creates a realistic look that mimics common dog breeds like boxers or mastiffs. However, many novice folders make frustrating mistakes that can ruin their projects and waste precious materials.
In this comprehensive guide, I’ll walk you through the exact process of creating a charming brown origami dog while helping you avoid the common pitfalls that plague beginners. With just a simple square of brown paper and about 15 minutes of your time, you’ll have a cute canine creation to display or gift to fellow dog lovers.
Materials You’ll Need
Before diving into folding your brown origami dog Brown, gather these simple supplies:
- Square brown paper (origami paper works best, but you can cut regular brown paper or kraft paper into a square)
- Flat surface for folding
- Bone folder or ruler (optional, for creating crisp folds)
- Black marker for adding facial details
- Pink/red marker (optional, for adding cheek accents)
COSTLY MISTAKE #1: Using paper that’s too thick or thin. Standard origami paper (approximately 70gsm) creates the best balance of flexibility and structure. Printer paper tends to be too stiff while tissue paper is too flimsy for beginners.
Step 1: Start with the Basic Fold
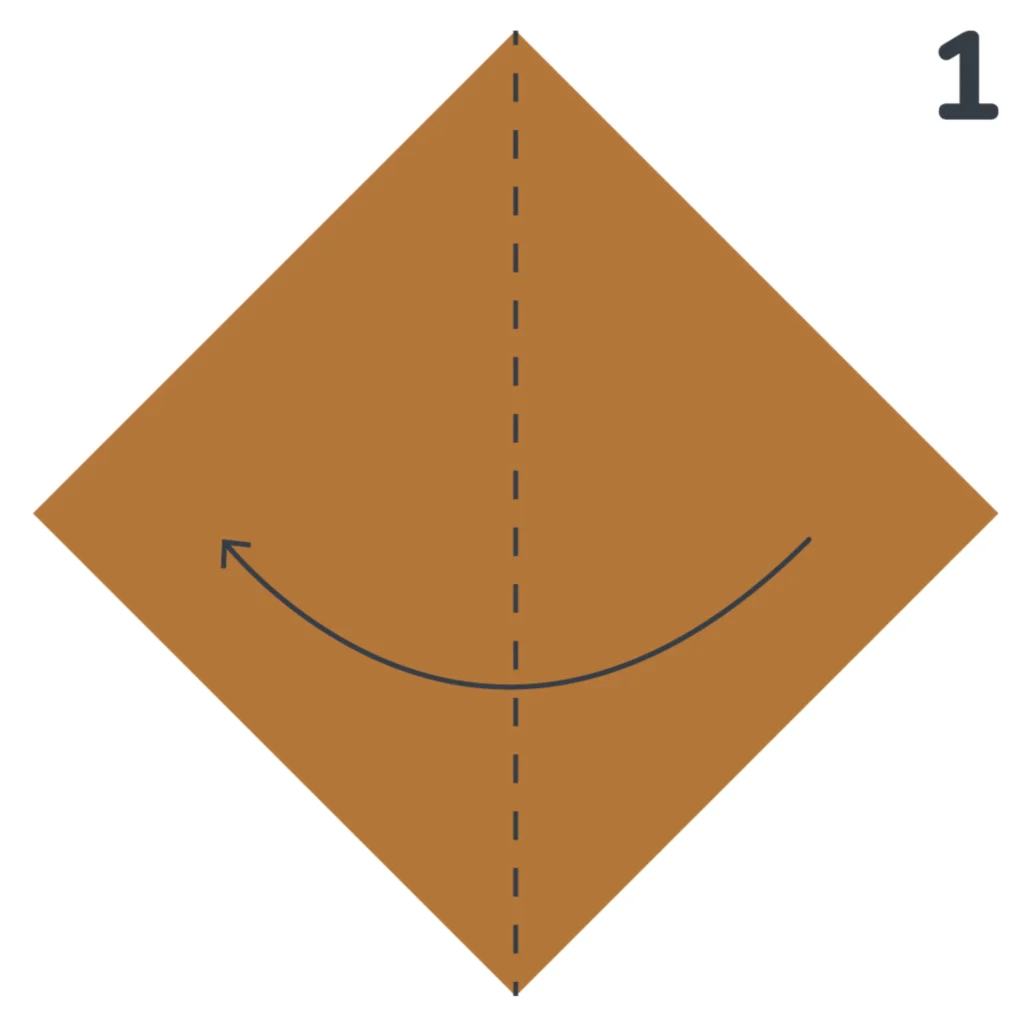
Begin with a square piece of brown paper positioned like a diamond (with corners pointing up, down, left, and right). Fold it in half diagonally from left to right, bringing the left corner to meet the right corner precisely.
Run your finger firmly along the crease and then unfold. This initial crease serves as an important reference line for later steps.
PRO TIP: Always make your first fold with extreme precision, as any small error will compound throughout the project. Align corners perfectly before pressing down on the fold.
COSTLY MISTAKE #2: Rushing through the initial fold. This foundation fold determines the symmetry of your entire origami dog Brown, so take your time to ensure corners align perfectly.
Step 2: Create the First Corner Fold
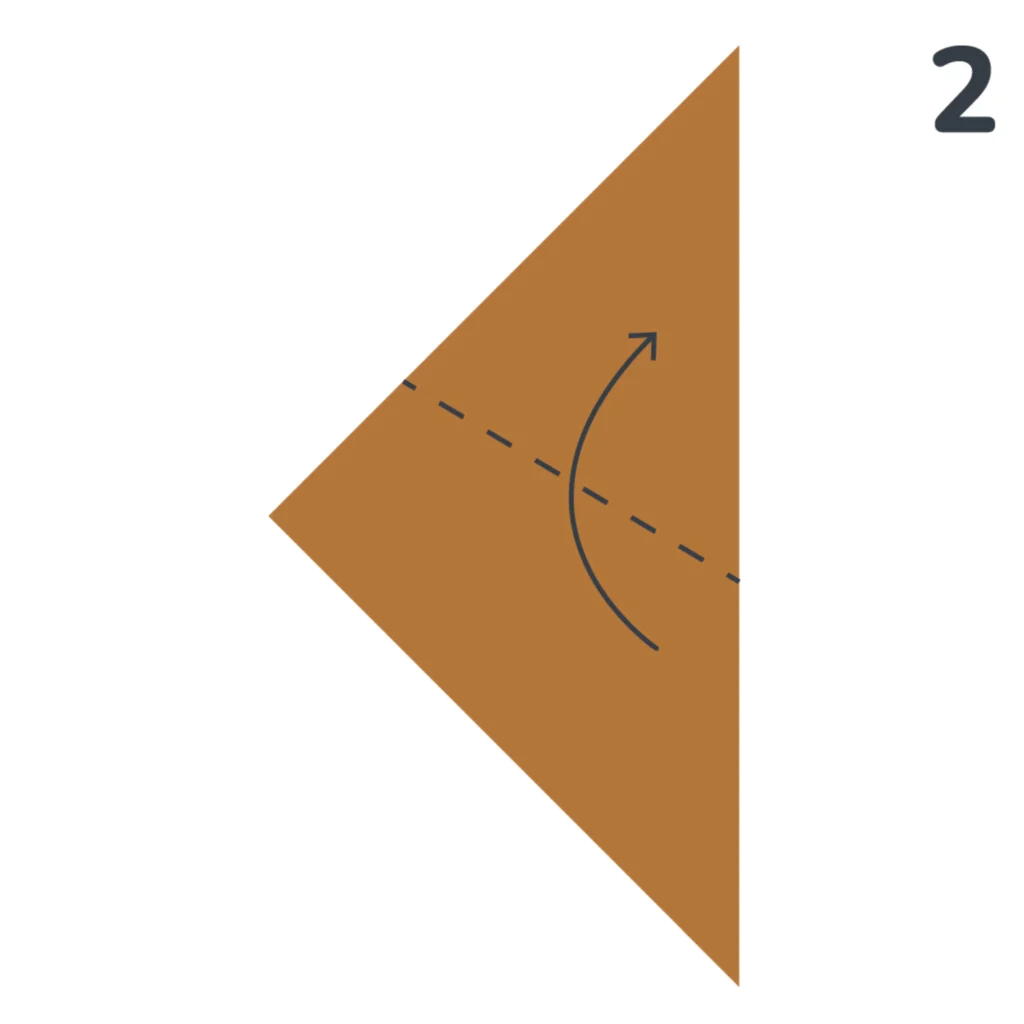
With your paper still positioned as a diamond, fold the top right corner toward the center diagonal crease you created in Step 1. The edge of this fold should be parallel to the bottom edge of your diamond.
Make sure this fold is clean and precise, as it begins to establish the shape of your dog’s head. Press firmly on the crease to set it in place.
PRO TIP: If you’re struggling with precision, try using a bone folder tool to create sharper, more defined creases. This inexpensive tool makes a significant difference in the quality of your finished origami.
COSTLY MISTAKE #3: Creating uneven pressure when making folds. Uneven pressure leads to wobbly lines that compromise the finished appearance of your origami dog Brown.
Step 3: Form the Base Structure

Now comes a slightly more complex fold. Continue folding to create an asymmetrical shape that will serve as your dog’s body and head foundation. This step essentially creates what origami enthusiasts call the “preliminary base” with modifications.
Fold the left section inward while maintaining the previous fold’s position. This creates a shape that resembles a boat or kite—the wider end will become your dog’s body while the narrower section forms the head.
COSTLY MISTAKE #4: Overlooking the importance of crease direction. In origami, some folds are “mountain folds” (creasing upward) while others are “valley folds” (creasing downward). Pay close attention to the direction shown in the reference image to avoid structural issues.
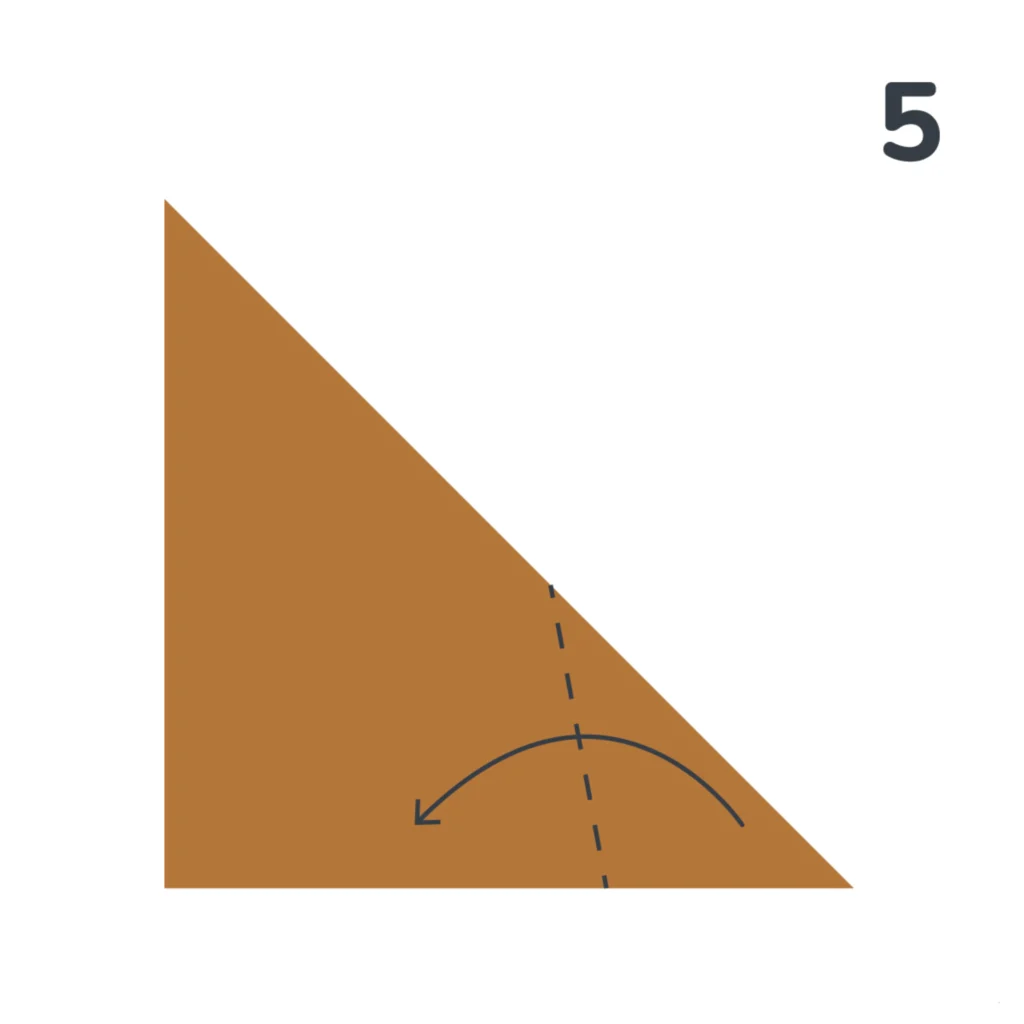
Step 4: Moving to Part 2 – The Diagonal Fold
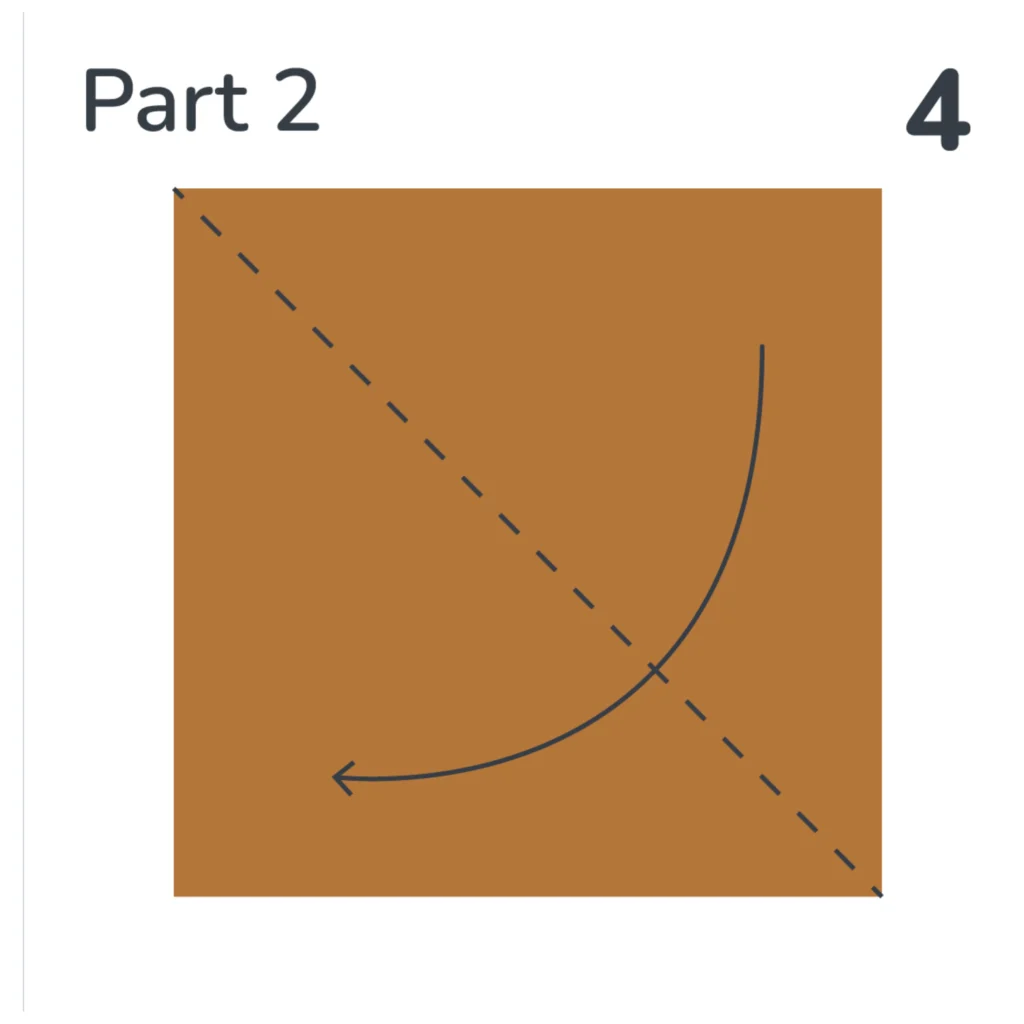
In this step, make a diagonal fold across the square section to establish your dog’s body proportions. This critical fold determines how your finished origami dog Brown will stand and the overall silhouette of the creation.
Position your partially folded paper so the wider section is facing down. Then fold diagonally from the top left corner down toward the bottom right, but not all the way to the edge—stop about halfway to create the proper angle for your dog’s back.
COSTLY MISTAKE #5: Folding the diagonal too far or not far enough. The exact angle of this fold determines whether your dog looks proportional or awkwardly shaped. Study the reference image carefully for proper positioning.
Step 5: Shape the Head Section
Now it’s time to give character to your origami dog by shaping its head. Fold the pointed corner to create the distinctive angle that will form your dog’s face and snout.
Bring the top corner down and slightly to the right, creating what will become the dog’s snout and face. The exact positioning of this fold determines whether your dog appears to be looking straight ahead or slightly to the side.
PRO TIP: For a more realistic look, make this fold slightly off-center to give your origami dog a three-dimensional appearance.
COSTLY MISTAKE #6: Creating a symmetrical fold here. Slightly asymmetrical folds in this step actually make your dog look more natural and dynamic.
Step 6: Define the Neck and Body
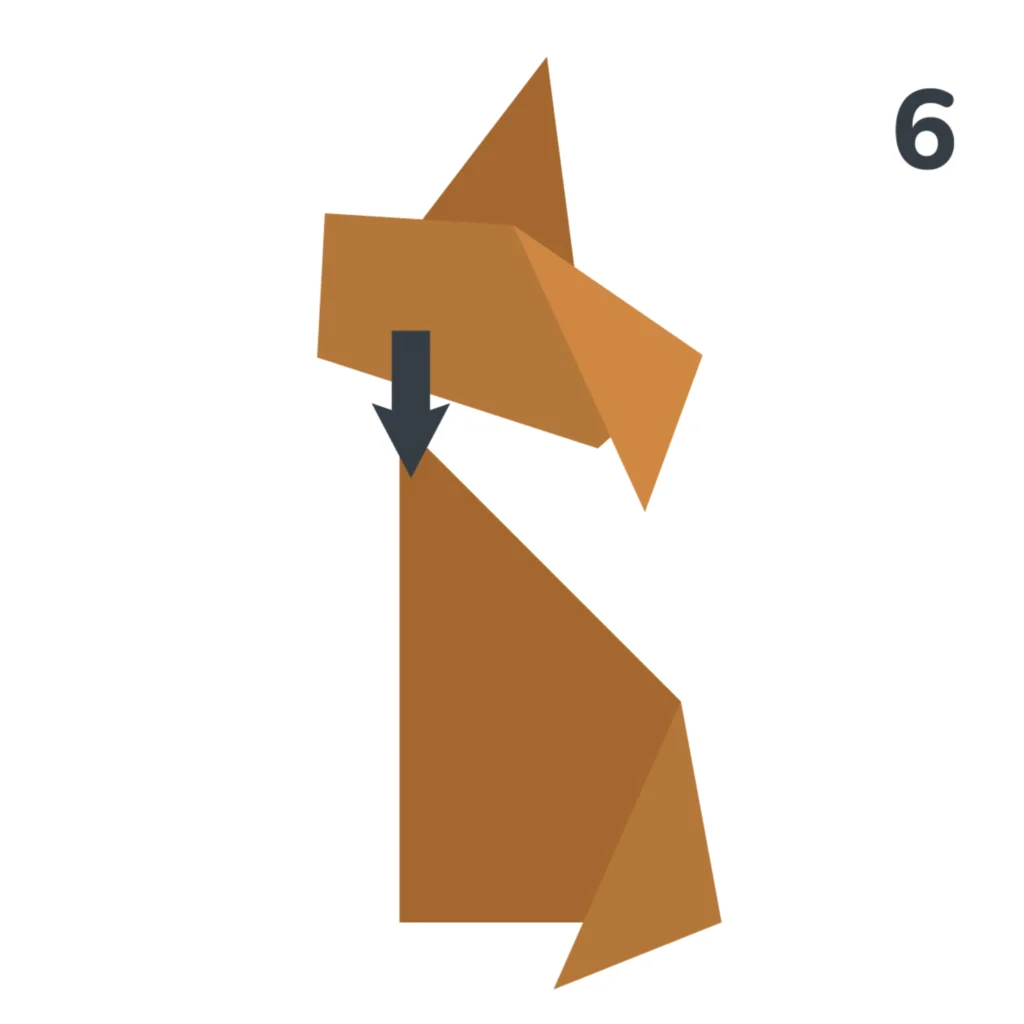
This step brings your origami dog to life by clearly separating its head from its body. Complete the structural folds that create the distinctive canine profile we recognize instantly.
Fold the middle section backward to create separation between the head and body. This reverse fold creates dimension and makes your origami dog stand upright more easily. Take special care with this fold as it’s often considered the trickiest part of the entire process.
COSTLY MISTAKE #7: Forcing the fold rather than gently working with the paper’s natural tension. This often tears the paper or creates unsightly creases where they shouldn’t be.
Step 7: Add the Final Touches
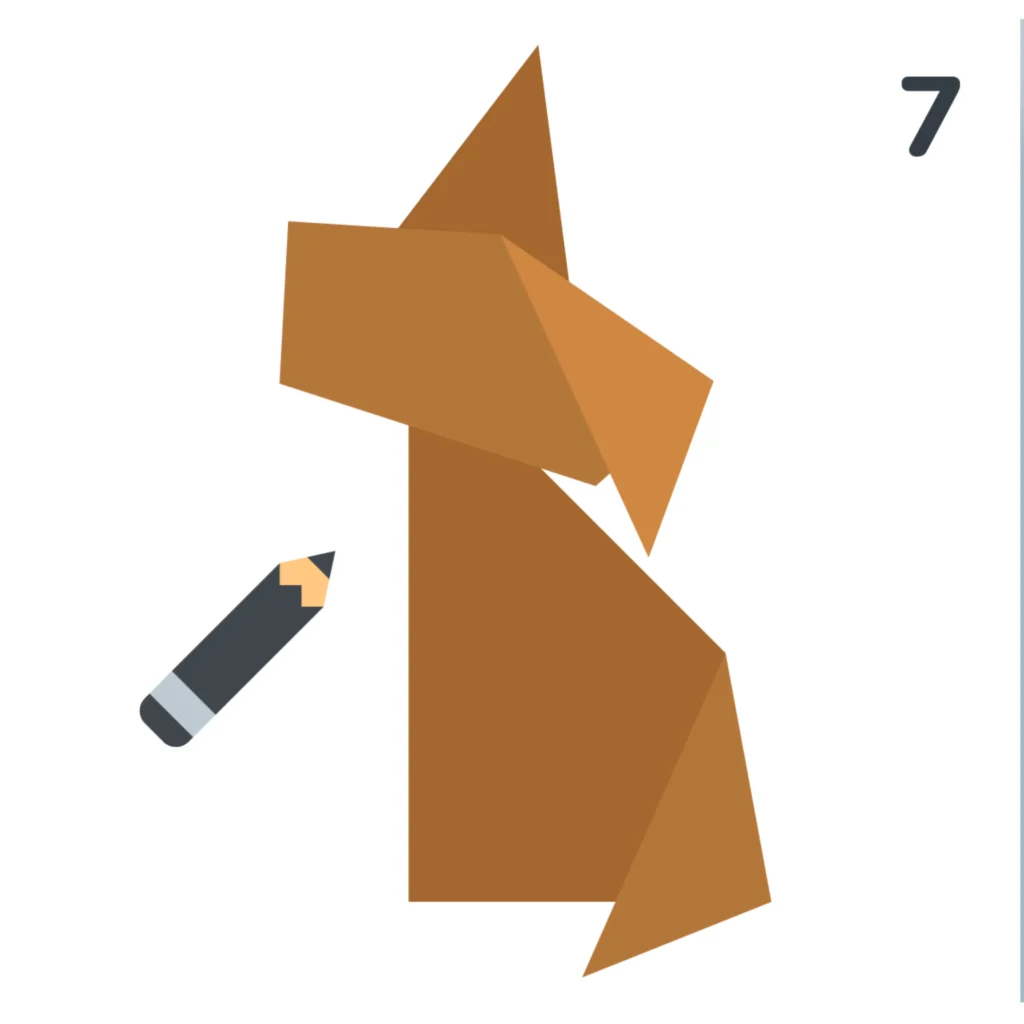
Now comes the fun part—giving your brown origami dog personality! Use a black marker to draw facial features like eyes, a nose, and maybe even a little smile. If you have a pink or red marker, add small circles on the cheeks for a touch of warmth and character.
Some folders also like to add small details like folded ears or a tiny tail at this stage. Feel free to get creative while maintaining the basic dog shape.
PRO TIP: Less is more when adding details. A simple dot for an eye and a small triangle for the nose often looks more elegant than elaborate drawings.
COSTLY MISTAKE #8: Adding details with permanent marker without practicing first. Consider sketching lightly with pencil before committing to permanent markers.
Step 8: Complete Your Origami Dog
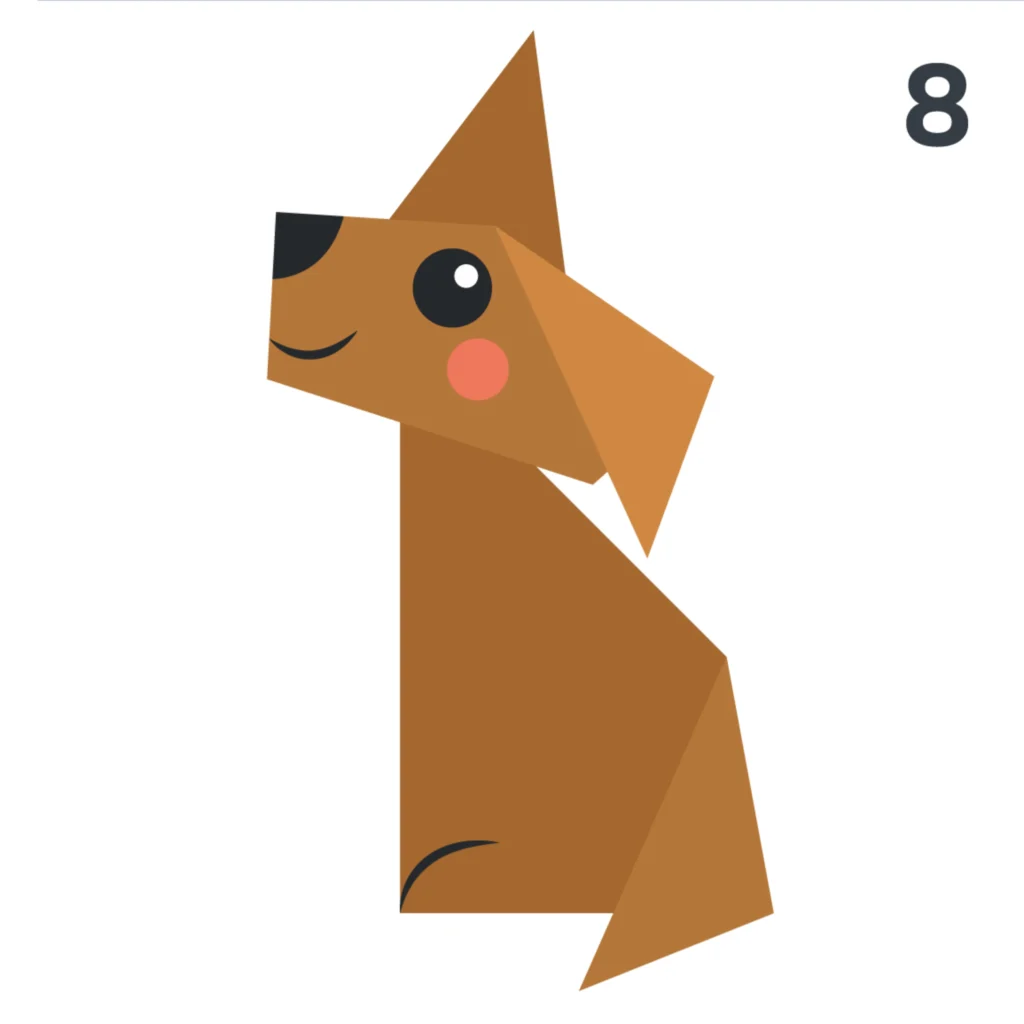
Congratulations! You’ve successfully created your brown origami dog with its cute face, triangular ears, and distinctive dog shape. Take a moment to make final adjustments to help your creation stand properly.
Gently shape the bottom to ensure your dog stands upright without tipping over. You may need to adjust the angle of the body fold slightly to achieve perfect balance.
COSTLY MISTAKE #9: Skipping final adjustments. Taking an extra minute to ensure your origami dog stands properly will significantly enhance its presentation.
Tips for Success
- Practice with regular paper first before using special brown origami paper
- Work on a clean, flat surface free from distractions
- Take your time with each fold—origami rewards patience
- Don’t be afraid to start over if a fold goes wrong
- Store your finished origami dog in a safe place away from moisture or crushing
- Consider spraying with clear fixative if you want to preserve it long-term
Why Choose Brown Paper for Your Origami Dog?
Brown paper offers several advantages for origami dogs specifically:
- Realistic appearance that mimics common dog breeds
- Hides small imperfections better than lighter-colored papers
- Creates natural shadows that enhance dimensional features
- Provides excellent contrast for added facial details
- More forgiving of fingerprints than white or bright papers
Common Questions About Origami Dogs
Q: How long does it take to make an origami dog? A: For beginners, allow about 15-20 minutes. With practice, you can create one in under 5 minutes.
Q: What size paper works best? A: 6×6 inch (15×15 cm) paper is ideal for beginners. Smaller papers require more dexterity while larger sheets can be unwieldy.
Q: Can I use wrapping paper instead of origami paper? A: Yes, but be aware that wrapping paper tends to tear more easily. Look for medium-weight wrapping paper without too much glossy coating.
Conclusion
Creating a brown origami dog is a delightful project that combines simplicity with charm. By following these eight carefully outlined steps and avoiding the costly mistakes many beginners make, you’ll be able to create adorable paper pups that impress friends and family.
Remember that origami, like any art form, improves with practice. Don’t be discouraged if your first few attempts aren’t perfect—each fold teaches you something valuable for your next creation.
Happy folding, and enjoy your new paper pet!
References and Further Resources
- Montroll, J. (2021). Origami Animals: A Step-by-Step Introduction to the Art of Paper Folding. Dover Publications.
- Lang, R. J. (2019). The Complete Book of Origami: Step-by-Step Instructions. Dover Publications.
- OrigamiUSA – The American origami organization with tutorials and resources
- Japan Origami Academic Society – Research and educational materials about origami
- International Origami Center – Dedicated to the promotion and preservation of origami
Have you tried making this brown origami dog? Share your creations in the comments below!