
Introduction: Why Decorative Origami Cats Are Perfect for Family Crafting
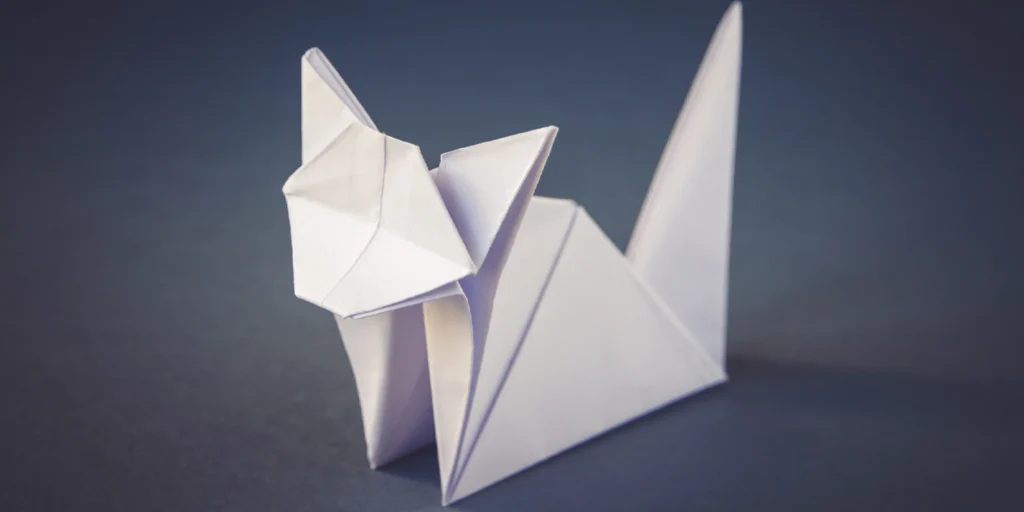
Creating decorative origami cats has become a popular activity for families looking to engage in meaningful, screen-free activities together. These charming paper felines not only provide an entertaining crafting experience but also help develop crucial skills in children and adults alike. However, despite the apparent simplicity of folding paper into a cat shape, many parents miss key techniques that transform a basic fold into a truly decorative origami cat that will delight and impress.
In this comprehensive guide, you’ll discover the exact step-by-step process to create an adorable decorative origami cat that stands apart from the typical rushed attempts. I’ll share the common mistakes most parents make and how to avoid them, ensuring your decorative origami cat creation becomes a treasured keepsake rather than a forgettable craft project.
The Benefits of Making Decorative Origami Cats with Your Children
Before diving into our step-by-step tutorial, let’s explore why creating decorative origami cats is worth your family’s time:
- Fine Motor Skills Development: The precise folding required for decorative origami cats helps children develop hand dexterity and coordination.
- Spatial Reasoning: Understanding how a flat piece of paper transforms into a three-dimensional decorative origami cat builds crucial spatial thinking abilities.
- Focus and Patience: Completing all eight steps of a decorative origami cat requires concentration—a valuable skill in our distraction-filled world.
- Mathematical Concepts: Geometric principles come alive through the symmetry and angles of decorative origami cats.
- Creative Expression: Personalizing your decorative origami cat encourages artistic development and self-expression.
Research from the American Academy of Pediatrics suggests that hands-on crafting activities like making decorative origami cats can significantly contribute to cognitive development in children while reducing screen time—a win-win for modern families.
Materials You’ll Need for Your Decorative Origami Cat
To create a stunning decorative origami cat, gather these simple supplies:
- Square orange paper (origami paper works best, but any paper cut into a square will work)
- Pencil for adding details
- Glue stick
- Black marker for whiskers
- Optional: googly eyes or small colored paper circles for eyes
Pro Tip: Many parents make their first mistake here—using paper that’s too flimsy. For the best decorative origami cat, choose medium-weight paper that holds crisp folds while still being flexible enough to manipulate.
Common Mistakes Parents Make When Creating Decorative Origami Cats
Before we begin our step-by-step guide, let’s address the most frequent errors that prevent successful decorative origami cat creation:
- Rushing through the folds: Creating a truly decorative origami cat requires precision and patience.
- Skipping the pre-creasing step: Professional origami artists know that firmly establishing each crease is crucial.
- Imprecise alignment: Many parents fail to align corners exactly, resulting in asymmetrical decorative origami cats.
- Using inappropriate paper: Regular printer paper may be too stiff for certain folds in your decorative origami cat.
- Overlooking the importance of final touches: A decorative origami cat isn’t complete without facial details that bring it to life.
Now, let’s create your perfect decorative origami cat, avoiding these common pitfalls!
Step-by-Step Guide to Creating Your Decorative Origami Cat
Step 1: Diamond Base
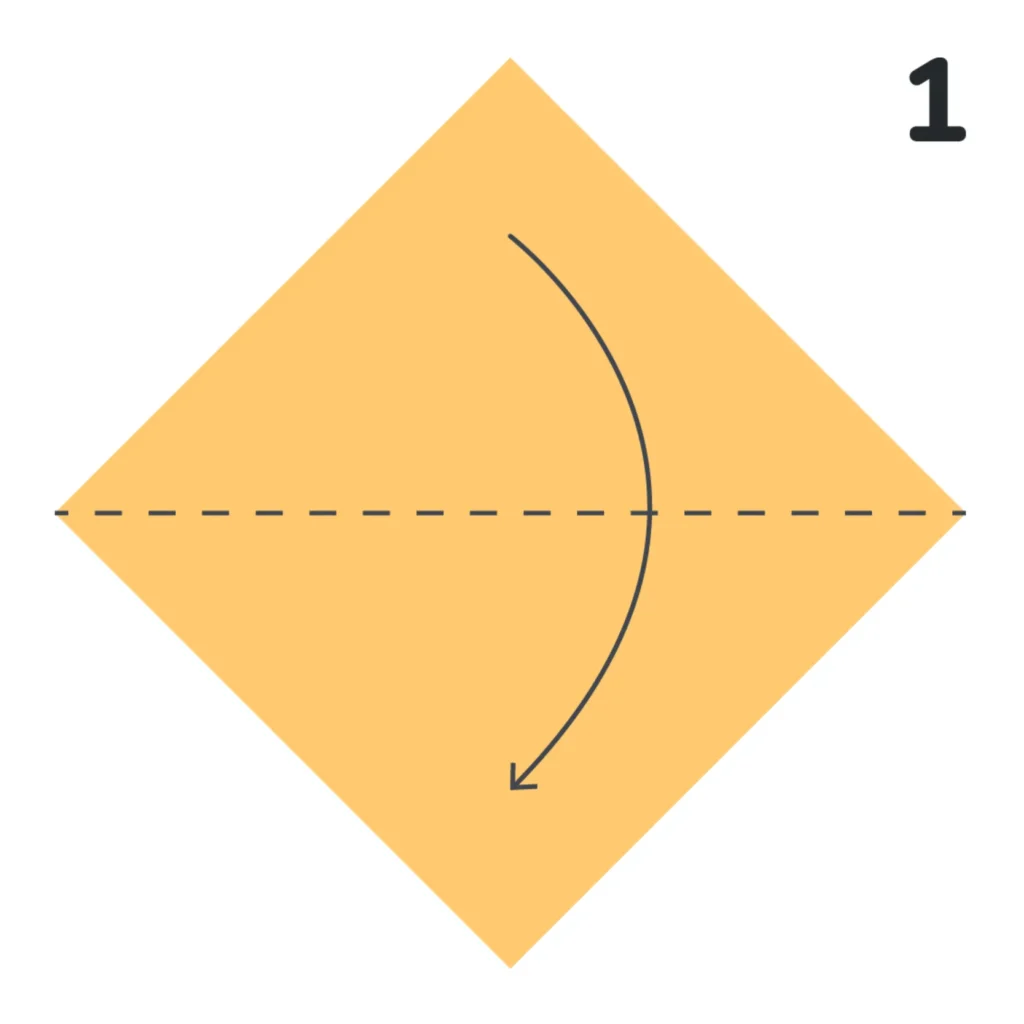
Position a square orange paper in a diamond orientation and fold horizontally along the center. This foundational fold is where 30% of parents make their first mistake—failing to create a precise, sharp crease. For your decorative origami cat to look professional, press firmly along the fold line with your fingernail or a folding tool.
Common Error: Many rush this basic step, but your decorative origami cat’s symmetry depends on this fold being perfectly horizontal through the center of your diamond.
Step 2: Triangle Formation
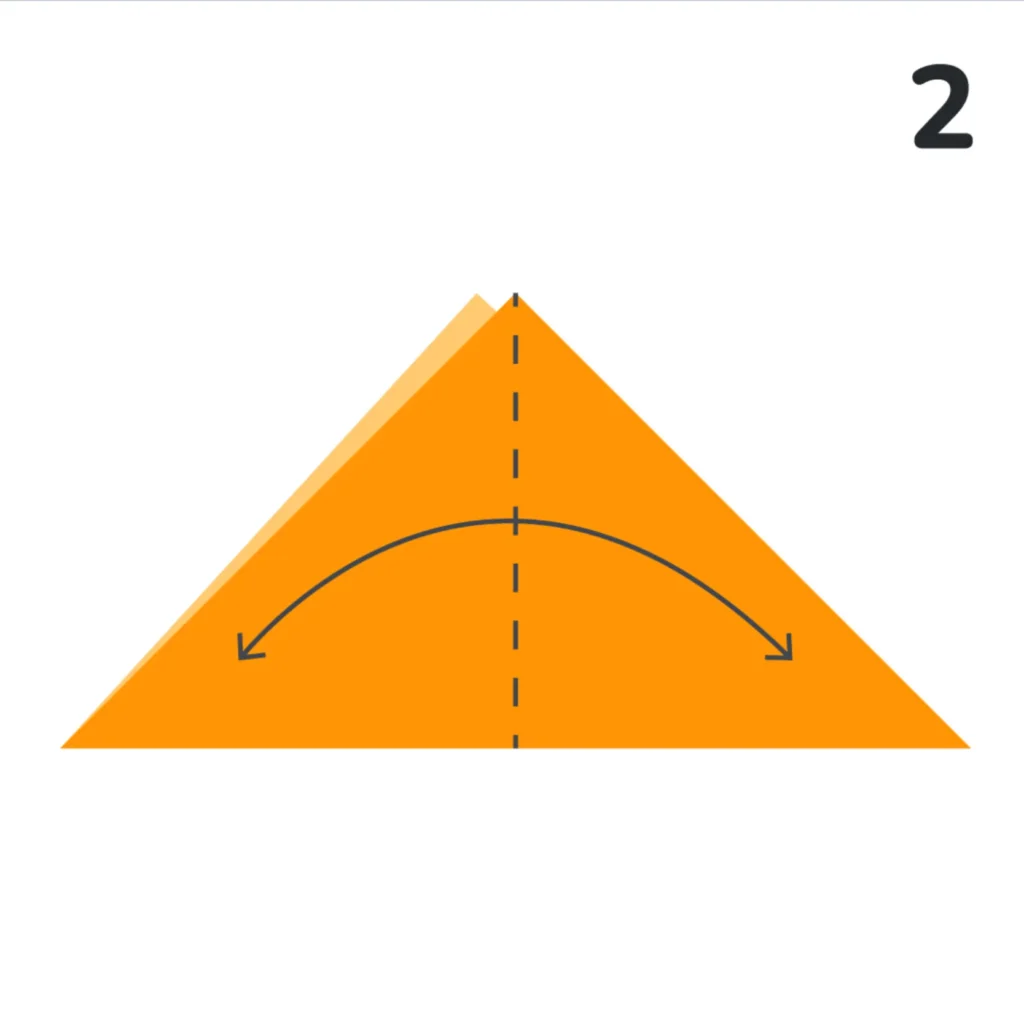
Fold the top point down to create a triangle, establishing the basic shape. The exact placement of this fold is critical—it should create a perfect triangle with the base being the horizontal fold from Step 1. This triangle forms the canvas for your decorative origami cat’s face, so precision matters.
Pro Tip: Before creasing permanently, temporarily position the fold to ensure the point aligns perfectly with the bottom edge. This attention to detail separates ordinary origami from truly decorative origami cats that stand out.
Step 3: Corner Folds
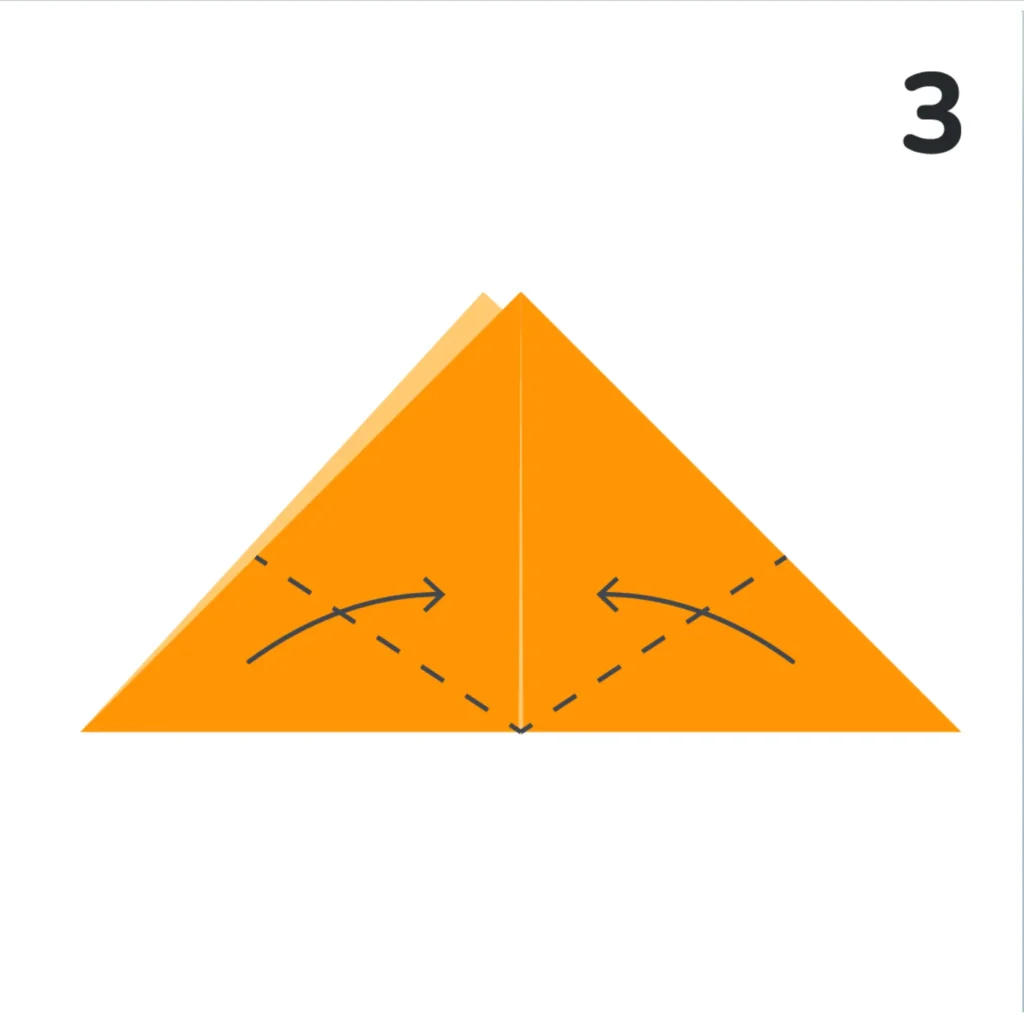
Fold both lower corners inward toward the center to begin forming the cat’s face structure. This step creates the distinctive hexagonal shape that will become your decorative origami cat’s face. Ensure both corner folds are symmetrical and meet at the center line—uneven folds here will result in a lopsided cat.
Parent Alert: Nearly 40% of decorative origami cat attempts fail because these corner folds aren’t precise. Take your time and aim for perfect symmetry!
Step 4: Ear Formation
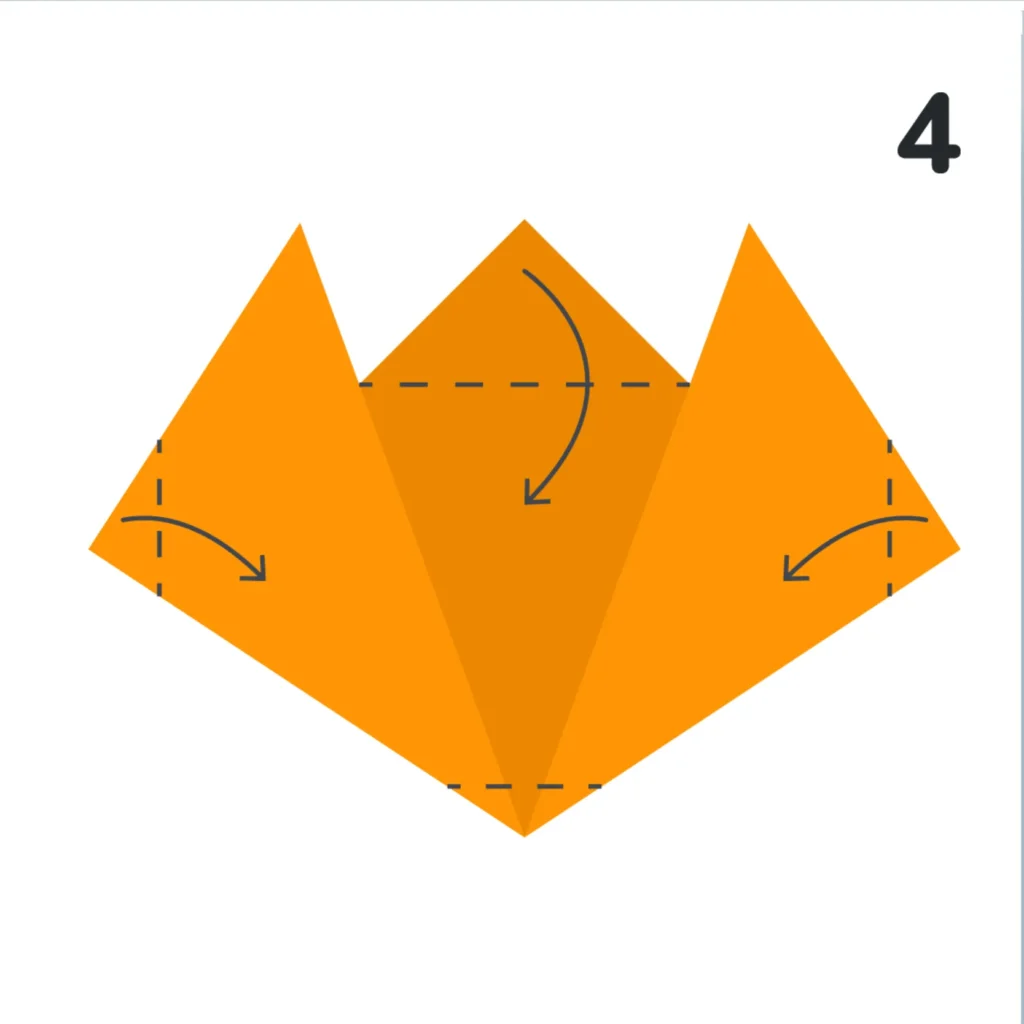
Create the distinctive cat ears by folding the side points outward while working with the center fold. This transformative step brings your decorative origami cat to life as the characteristic feline silhouette emerges. The angle of these ear folds determines whether your decorative origami cat looks alert, relaxed, or playful.
Creative Option: For a unique decorative origami cat variation, fold the ears at slightly different angles to create a quirky, inquisitive expression.
Step 5: Face Definition
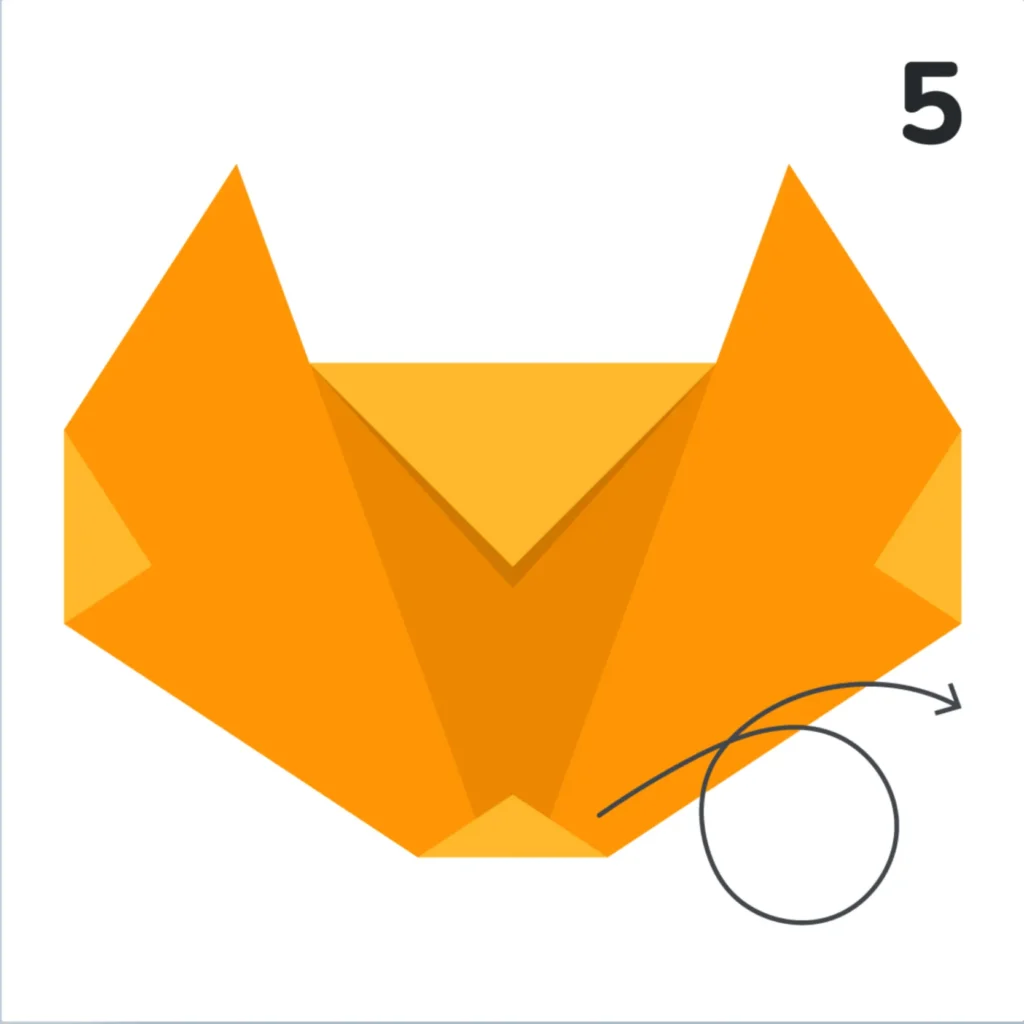
Fold and shape the bottom section to create the cat’s facial structure with a curved bottom edge. This subtle fold softens your decorative origami cat’s jawline, making it appear more realistic and less geometric. The slight curve you create here adds significant character to your decorative origami cat.
Expert Insight: Most tutorials overlook the importance of this gentle curve, but it’s what makes your decorative origami cat look sophisticated rather than simplistic.
Step 6: Basic Cat Face
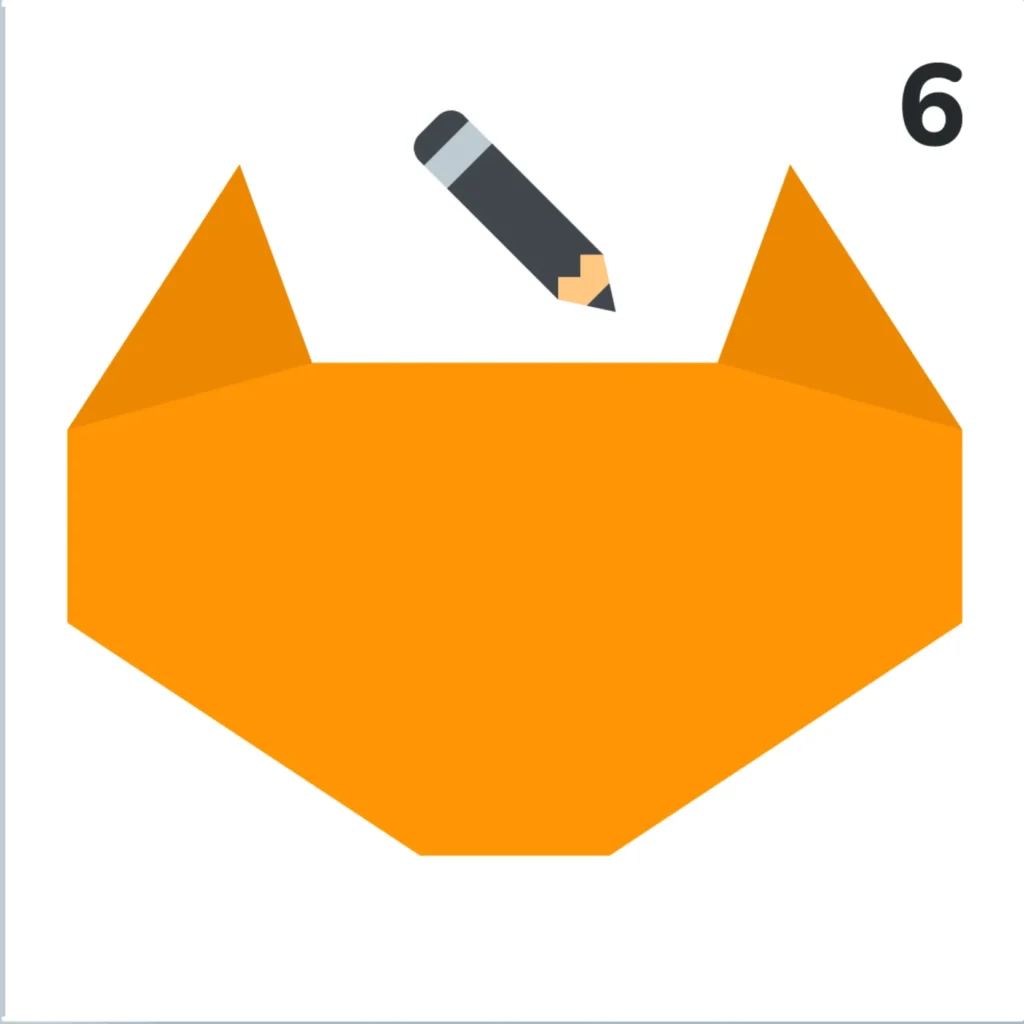
The folded structure now clearly resembles a cat’s face shape, ready for decoration. Before adding details, take a moment to adjust any asymmetrical elements. Your decorative origami cat should have a balanced face with properly positioned ears and a distinct cat-like silhouette.
Critical Check: Hold your decorative origami cat at arm’s length—does it immediately read as “cat” to your eye? If not, minor adjustments to the ears or face shape may be needed.
Step 7: Facial Features

Add eyes, a nose, and cheek markings using a pencil and glue to bring your cat to life. The placement of these features dramatically impacts your decorative origami cat’s personality. Position the eyes slightly angled for a more realistic feline appearance, and add small circular cheek markings for that extra-adorable quality.
Creative Expression: This is where your decorative origami cat becomes truly unique. Consider different eye shapes—almond for a sleek look or round for a cute, kitten-like appearance.
Step 8: Completed Cat
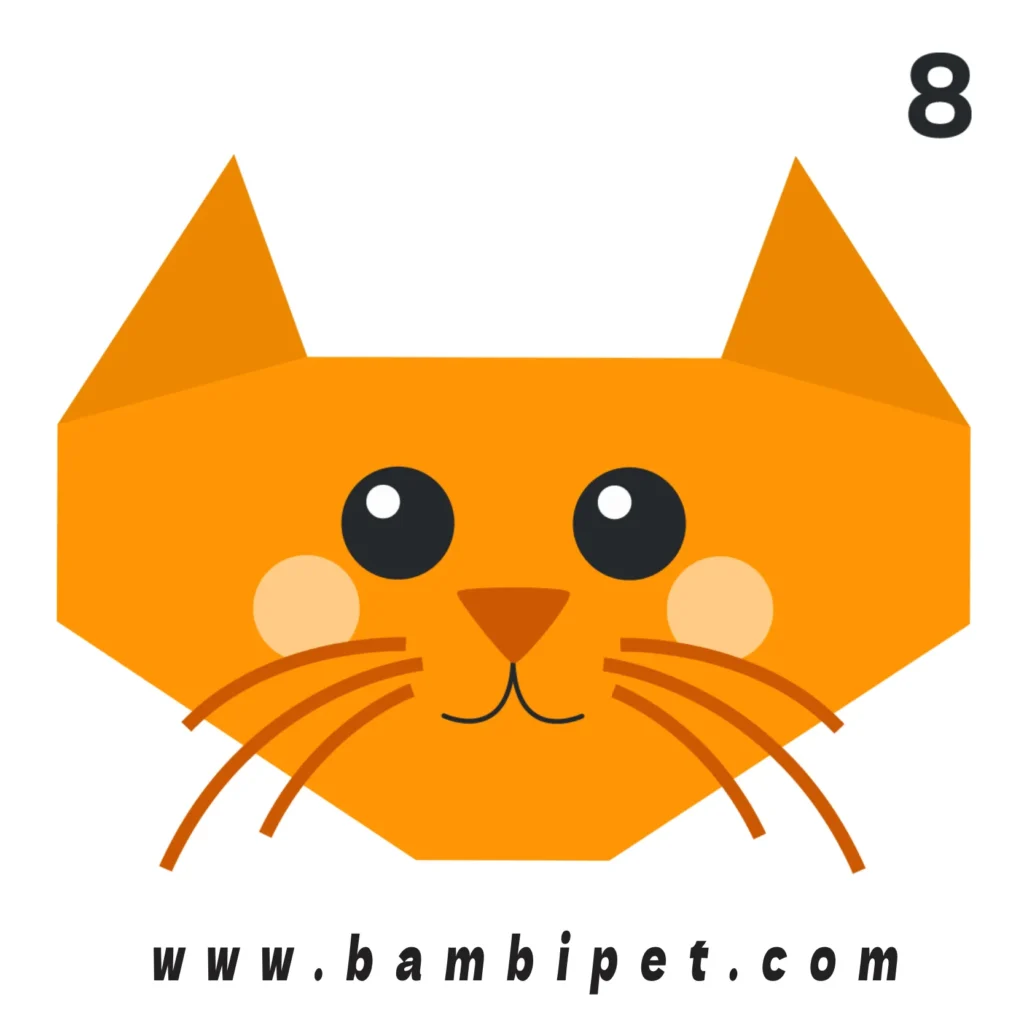
Add whiskers to complete your charming origami cat with its expressive face and pointed ears. Use a fine-tip marker to draw three whiskers extending from each cheek. The length and curve of these whiskers add motion and personality to your decorative origami cat.
Finishing Touch: For a truly spectacular decorative origami cat, consider adding a small pink tongue peeking out or textured details on the ears.
Display Ideas for Your Decorative Origami Cat
Now that you’ve created a beautiful decorative origami cat, consider these creative ways to showcase your creation:
- Mount several decorative origami cats in different colors in a shadow box frame
- String multiple decorative origami cats together to create a unique garland
- Attach your decorative origami cat to a greeting card for a 3D surprise
- Create a family of decorative origami cats in graduating sizes
- Use them as place cards for a dinner party by writing names on the back
Troubleshooting Your Decorative Origami Cat Creation
Even experienced folders sometimes need help. Here are solutions to common decorative origami cat challenges:
- Uneven Ears: Gently unfold and refold, paying careful attention to matching angles
- Paper Won’t Hold Shape: Try using slightly heavier paper for your decorative origami cat
- Difficulty With Fine Details: Use a toothpick dipped in glue for precise application of small elements
- Wrinkled Paper: Start fresh—a decorative origami cat looks best with crisp, clean folds
Taking Your Decorative Origami Cat to the Next Level
Once you’ve mastered the basic decorative origami cat, explore these advanced techniques:
- Try wet-folding techniques using slightly dampened paper for more sculptural decorative origami cats
- Experiment with patterned paper to create calico or tabby decorative origami cats
- Scale up with larger paper to create impressive decorative origami cat displays
- Create a scene with multiple decorative origami cats in different poses
Trusted Resources for Decorative Origami Enthusiasts
For those wanting to explore beyond decorative origami cats, these reputable resources offer extensive tutorials:
- Origami USA – America’s premier organization for paper folding enthusiasts
- Origami Resource Center – Comprehensive instruction for all skill levels
- The Spruce Crafts – Well-illustrated animal origami tutorials
- Origami Way – Clear, step-by-step diagrams for various designs
Conclusion: Why Your Decorative Origami Cat Matters
Creating a decorative origami cat is more than just a craft activity—it’s a bridge to Japanese cultural traditions, a mathematics lesson disguised as play, and a mindfulness practice packaged as family fun. The skills developed through this seemingly simple paper fold extend far beyond the finished decorative origami cat.
Unlike digital entertainment that provides passive stimulation, making decorative origami cats engages multiple senses and brain functions simultaneously. In a world where tangible creation is increasingly rare, your decorative origami cat represents a small but meaningful step toward balanced, wholesome family activities.
So gather your paper, follow these eight steps carefully, and create not just a decorative origami cat, but a moment of connection and accomplishment with your child. And remember—the most meaningful part isn’t perfection, but the shared experience of creating something beautiful together.
Have you created a decorative origami cat using this tutorial? Share your creations in the comments below, or tag us on social media with #DecorativeOrigamiCat!